Trading Tips
Forex Trading Plan for Beginners: A Simple Template and Pre-Trade Checklist
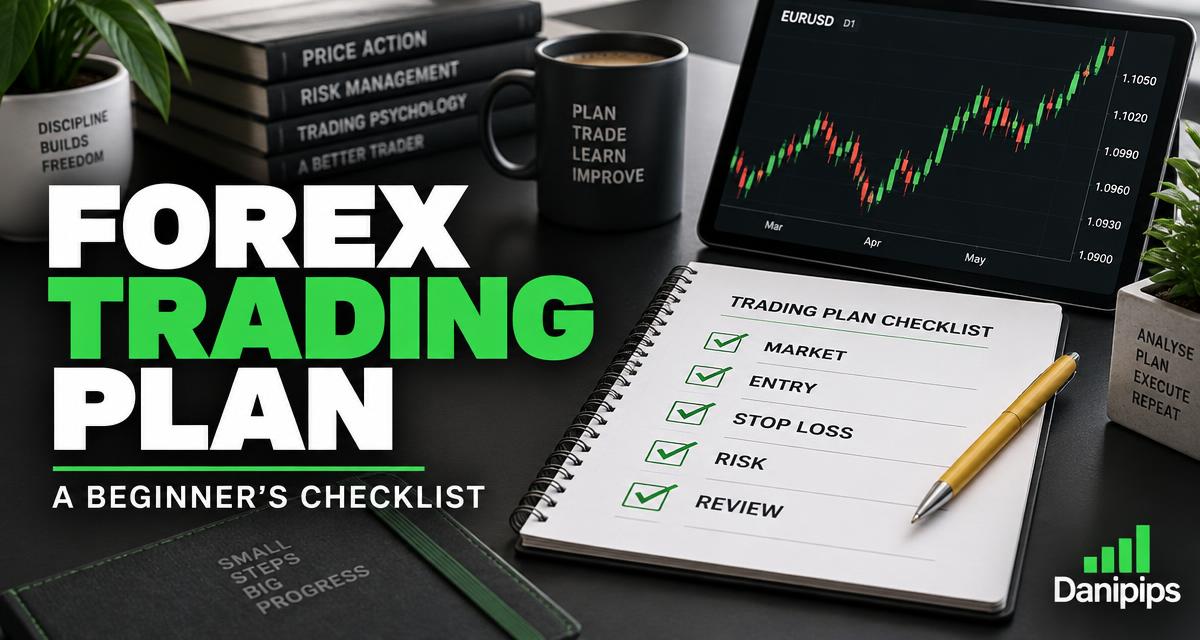
A forex trading plan is a written set of rules for what you trade, when you trade, how you enter and exit, and how much you can lose. It does not predict the market. It helps you make consistent decisions when prices move and emotions become loud.
If you are new to forex, you do not need a complicated system with ten indicators. You need a small plan you can explain, practise on demo, and review honestly. This guide gives you a practical trading-plan template, a worked EURUSD example, and a pre-trade checklist you can copy into a notebook.
Quick answer: A beginner forex trading plan should define your market, trading session, setup, entry trigger, stop loss, position size, exit rules, and review process. Decide these before opening a trade—not after the price moves against you.
What is a forex trading plan?
Think of a trading plan as the difference between a business decision and a guess. “EURUSD looks like it might rise” is an opinion. “I will consider a long trade only after my chosen setup forms, and I will size it so the planned loss stays within my limit” is a decision framework.
A strategy describes a setup. A trading plan is broader: it includes your available time, risk budget, execution conditions, and response to losses. Two traders can use the same strategy but get different outcomes because one follows clear limits while the other keeps changing position sizes.
A plan cannot guarantee profitability. Spreads, slippage, imperfect execution, and changing market conditions all affect results. Its first job is to make your actions measurable.
Step 1: Choose one market and a realistic schedule
Beginners often jump between gold, several currency pairs, and crypto looking for action. Each market behaves differently. Start with one instrument you can study consistently, rather than assuming more charts mean more opportunities.
EURUSD is a common learning choice because it is widely traded, but its spread still varies by broker, account, and market conditions. Gold can move sharply and has different contract specifications. If you choose XAUUSD, read the gold lot-size guide before using a forex pip calculation on it.
Write down when you can actually watch the market. A person with a full-time job should not choose a system that requires constant attention during working hours. State the timezone in your plan, and remember that London and New York schedules shift relative to some countries when daylight saving changes.
Use Danipips Markets for an overview, but use your broker’s executable bid and ask prices for trade decisions. A website quote is not a promise that you can trade at that price.
Step 2: Define your setup in plain language
“I buy when I feel confident” is not a testable setup. Choose conditions you can observe and record. For example, a demo practice setup could involve a pullback toward a marked support area during an upward trend, followed by a completed candle that meets your predefined confirmation rules.
This is an illustration, not a proven profitable strategy. A support area can fail, a trend can reverse, and a confirmation candle can still lead to a loss. The important skill is defining the conditions before the trade.
Your setup notes should answer:
- Which chart timeframe provides context?
- What makes the trend or range clear enough to trade?
- Which price area matters, and why?
- What exact event allows an entry?
- What conditions cancel the setup?
If you cannot describe the setup without looking at the eventual result, you may be judging with hindsight. Learn the basics first in How to Read a Forex Chart.
Step 3: Set the stop loss before calculating size
A stop loss belongs where your trading idea becomes invalid—not at an arbitrary distance chosen to make a larger position affordable. Once you have a logical stop location, calculate the position size around it.
For example, if your demo setup calls for a stop 20 pips from entry, the next question is how small your position must be to fit your risk budget. It is not whether you can pull the stop closer to trade a bigger lot.
A stop order is not an absolute loss guarantee. During gaps, fast markets, or poor liquidity, execution can occur at a worse price. Spread, commission, and financing charges can add costs too. Avoid trading if the likely costs or execution conditions make the plan impractical.
Read the stop-loss and take-profit guide for a more detailed introduction.
Step 4: Calculate a fixed risk budget
For demo practice, you can choose a small percentage of account equity as a planned risk limit. This guide uses 0.5% per trade only as a worked example, not a universal recommendation. A suitable limit depends on your circumstances; real leveraged trading may be inappropriate for you entirely.
Suppose a USD-denominated demo account has $1,000 equity. A 0.5% planned risk budget is $5:
$1,000 × 0.005 = $5.
For a typical EURUSD contract of 100,000 base-currency units per standard lot, one pip at 0.01 lot is approximately $0.10 in a USD account. At a 20-pip stop, 0.01 lot therefore has about $2 of price-movement risk. A theoretical 0.025-lot position would have about $5 of risk before costs.
If the broker allows only 0.01-lot increments, 0.025 is not available. Rounding down to 0.02 lot gives about $4 of price-movement risk; rounding up to 0.03 gives about $6 and exceeds this example’s limit before costs. You may need to size smaller again to allow for commission and slippage, or skip the trade.
Always verify the instrument’s contract size, minimum volume, volume step, and account currency with your broker. These numbers cannot simply be copied to gold or every currency pair. Use the position-size calculator and pip-value calculator as learning aids, then confirm the inputs.
Step 5: Write your exit rules
Before entry, decide how you will exit if the idea works and if it fails. Your plan might use a predefined target based on a price level, a fixed risk–reward objective, or another clearly defined approach. Do not switch methods halfway through a losing trade just to avoid accepting the loss.
A 1:2 risk–reward example means targeting twice the planned price risk. With a 20-pip stop, that would be a 40-pip target. It does not mean the market is likely to reach it.
At 1:2, the theoretical break-even win rate is about 33.3% before costs, assuming every loss is exactly one risk unit and every win is exactly two. Actual costs and deviations increase the required win rate. Read the risk–reward guide before treating a target ratio as evidence of an edge.
Include a rule against widening the stop simply because a trade is losing. If you use trailing stops, partial exits, or time-based exits, define those actions precisely and test them rather than improvising.
Step 6: Add clear no-trade conditions
A useful plan tells you when to stay out. Missing a trade is not the same as losing money, and inactivity can be the correct decision.
Possible demo-practice no-trade rules include:
- The entry trigger has not occurred.
- The spread is above your written limit.
- Major scheduled news is inside your chosen exclusion window.
- The required position is below the broker’s minimum size.
- You cannot explain where the setup becomes invalid.
- You are tired, distracted, or trying to recover a loss quickly.
- You already have exposure that would make the next trade exceed your total risk limit.
Check the economic calendar before trading, and learn how to read scheduled events. Avoid setting an arbitrary news window and assuming it makes trading safe: volatility can remain elevated before and after a release.
Step 7: Limit the session, not just one trade
Several small losses can add up, especially if you keep reopening similar positions. Set a session limit and consider total open risk, not just the percentage on one order. EURUSD and GBPUSD positions may share US-dollar exposure; they are not automatically independent bets.
For an illustrative demo routine, you might stop opening trades after two losses or after reaching a 1% planned daily loss limit, whichever comes first. These are practice examples, not industry requirements or guarantees. Stop rules do not prevent gaps or slippage from taking actual losses beyond a planned threshold.
The purpose of a stopping rule is to interrupt revenge trading. When it activates, close the platform for new entries, record what happened, and review later. Do not increase the lot size to win the money back.
Copy this beginner trading-plan template
Use the following prompts in a notebook or document. Fill in the blanks before you start your next demo session.
- Purpose: Learn consistent execution on a demo account; no income target.
- Market: One selected instrument, with contract specifications checked.
- Schedule: Defined session and timezone that fit my daily life.
- Context: The chart timeframe and market conditions I will study.
- Setup: Observable conditions that must all be present.
- Entry: The exact trigger and order type I will use.
- Invalidation: The price or event that makes the idea wrong.
- Risk: My per-trade and total-open-risk limits, including cost allowance.
- Size: Calculated from risk budget and stop distance; rounded down where necessary.
- Exit: Written stop, target, and any tested management rules.
- Skip: My spread, news, fatigue, and missing-setup conditions.
- Session stop: The point at which I stop taking new trades.
- Review: Screenshot, reason, costs, result, and whether I followed each rule.
Keep the first version short enough to read before every trade. A two-page plan you follow is more useful than a fifty-page document you ignore.
A complete EURUSD demo example
Imagine $1,000 of virtual equity, a hypothetical long entry at 1.1000, and a stop at 1.0980. The stop distance is 20 pips. A target at 1.1040 is 40 pips away, giving a planned 1:2 ratio before costs.
Using the typical contract assumptions above, a 0.02-lot position has roughly $4 of stop-distance risk and an $8 gross target. Commission, spread effects, and slippage can change the actual outcome. This example uses invented prices; it is not a live signal, recommendation, or evidence that this setup has positive expectancy.
Before placing the order, the trader checks that the trigger exists, scheduled news does not violate the plan, and the total exposure remains within the written limits. If any check fails, there is no trade. If the market hits the stop, the trader records a normal planned loss rather than changing the system immediately.
How to review your plan without fooling yourself
Do not judge your plan by one winning trade. A profitable outcome can come from a bad decision, and a well-executed trade can lose. Record both the result and the quality of execution.
After each session, ask whether you followed the entry, sizing, and exit rules. Note the spread and costs, take a chart screenshot, and write one sentence about your emotional state. Review a meaningful sample across different conditions before drawing conclusions; there is no magic number of trades that proves future profitability.
Change one rule at a time and keep the old results separate. If you rewrite the plan after every loss, you cannot tell whether the strategy failed or you simply never tested the same process consistently. The trading psychology guide can help you recognise that pattern.
Practise on a demo account first
You can practise entries, position sizing, and journaling without risking deposited funds by using a demo account. Demo results still do not reproduce all the pressures and execution conditions of real trading.
If Exness is available and permitted where you live, follow the free Exness demo-account guide. Check current product availability and terms rather than assuming every region has the same options.
Explore Exness through the Danipips referral link.
Referral disclosure: This is a Danipips referral link. Danipips may receive compensation if you join and meet the broker’s qualifying conditions. That does not guarantee better pricing, eligibility, or trading results. You do not need to deposit money to read this guide or practise the planning process.
Frequently asked questions
Do beginners need a trading plan?
Yes, if they choose to practise trading. A plan makes decisions consistent and reviewable. It cannot remove market risk or turn an untested strategy into a profitable one.
Can I use the same plan for gold and forex?
You can reuse the structure, but not necessarily the risk inputs. Contract sizes, price increments, volatility, spreads, and session behaviour differ. Recalculate and test the plan for each instrument.
What is the best risk percentage per trade?
There is no universal best percentage. Smaller planned exposure generally reduces the size of individual losses, but even small leveraged trades can lose more than expected. The 0.5% used here is a demonstration, not personal financial advice.
How often should I change my plan?
Review regularly, but avoid changing it because of a single outcome. Use your journal to identify repeated problems, make a defined adjustment, and test it separately.
Does a trading plan guarantee profits?
No. A plan improves discipline and record-keeping; profitability depends on whether an approach has an edge after costs and whether it can be executed. Many retail traders lose money trading leveraged products.
The bottom line
Start with one market, one observable setup, and a written limit on what you can lose. Size positions only after defining the stop. Know when you will stay out, and review whether you followed the process—not just whether you made virtual money today.
Continue learning in the free Danipips Forex Course before considering real-money trading.
Risk warning: This article is educational, not personalised investment advice or a trading signal. Leveraged forex and CFD trading can produce rapid losses and may not be suitable for you. Demo success does not guarantee live results. Never trade money you cannot afford to lose.